Add Row
Add Element
cropper
update
HealthWorks Nevada
update
Add Element
  • Home
  • Categories
    • Quick & Healthy Recipes
    • Mind & Mood Boosters
    • Longevity & Vitality
    • Everyday Health Hacks
    • Healthy Home & Environment
    • Alternative Wellness
    • Chiropractic & Body Alignment
    • Movement & Fitness
August 27.2025
3 Minutes Read

Unlock the Secrets of Homemade Pumpkin Pie Spice Addition for Every Meal

Homemade Pumpkin Pie Spice Blend (+ Recipes)

Why Pumpkin Pie Spice Is More Than Just a Fall Favorite

As the air turns crisp and the leaves begin to don their vibrant hues, many of us are drawn to the comforting embrace of pumpkin pie spice. This spice blend, often heralded for its role in Halloween and Thanksgiving delights, offers more than festive recipes; it embodies a complex array of flavors that signal the incoming winter. Let’s explore why this seasonal staple deserves a spot in your kitchen year-round.

The Health Benefits of Homemade Pumpkin Pie Spice

One of the best reasons to whip up your own pumpkin pie spice is the opportunity to control its ingredients. Unlike store-bought versions, which may include additives and preservatives, a homemade mix provides pure, fresh spices that can enhance your dish's taste and health benefits.

Many of the spices within this blend, including cinnamon and nutmeg, are renowned for their health properties. Cinnamon is linked to improved insulin sensitivity and may help lower blood sugar levels, while nutmeg contains compounds that may promote digestion and improve sleep quality. Alongside ginger and allspice, which both lend antioxidant benefits, this blend does more than flavor your food—it supports well-being.

Simple Steps to Create Your Own Blend

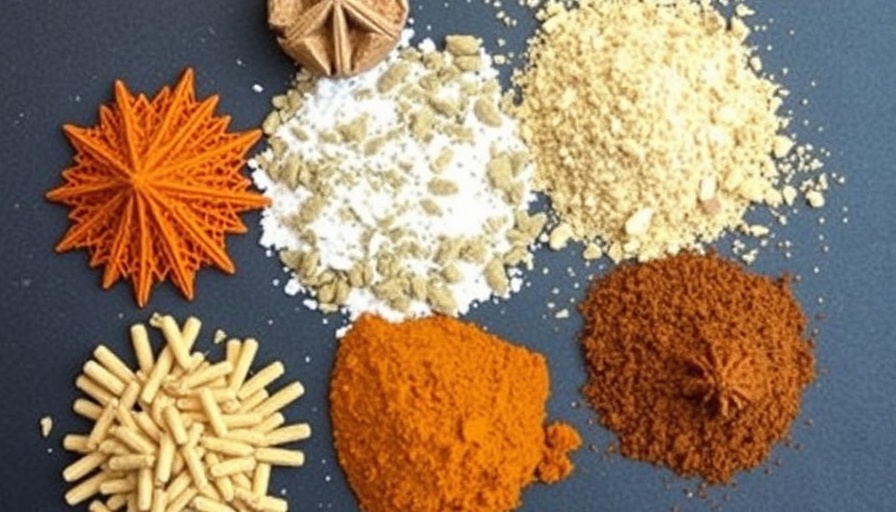
Crafting your own pumpkin pie spice is incredibly easy and requires just a few simple ingredients:

  • 4 teaspoons ground cinnamon
  • 2 teaspoons ground ginger
  • 2 teaspoons ground nutmeg
  • 2 teaspoons ground allspice
  • 1 teaspoon ground cloves (optional, to taste)

Combine all these ingredients in a jar and shake until well mixed. Not only can you tailor the proportions to suit your personal palate (e.g., adding more ginger for a spicier kick), but this homemade spice mix makes for thoughtful gifts that carry the warmth of your creativity.

Delicious Ways to Use Pumpkin Pie Spice Year-Round

While your mind might initially focus on sweet pumpkin pies or seasonal lattes, the versatility of this spice blend can extend far beyond autumn. Here are just a few innovative ways to integrate pumpkin pie spice into your daily meals:

  • Breakfast Boost: Add it to oatmeal or yogurt for a warm, inviting breakfast bowl.
  • Savory Dishes: Sprinkle it on roasted vegetables, such as butternut squash, for a novel flavor twist.
  • Beverages: Stir it into smoothies or hot beverages, transforming your everyday drinks into seasonal delights.

Incorporating pumpkin pie spice isn’t just about enjoying your food; it’s about embracing the flavors that resonate with seasonal changes and enhancing your meals with health benefits.

Storing Your Spice Blend for Optimal Freshness

To maintain the integrity and flavor of your spice blend, store it in an airtight container in a cool, dark place. Properly stored, your homemade pumpkin pie spice can last for up to six months, ensuring that you’ll always have that cozy, warm flavor on hand whenever the craving strikes.

Conclusion: Embrace the Spice of Autumn All Year Long

From indulging in warm beverages to using it as a unique seasoning for savory dishes, homemade pumpkin pie spice is much more than a fleeting fall trend. It represents comfort, health, and creativity all in one jar. So why not take a few moments to blend your own mix? With minimal effort, you’ll bring the essence of the season into your kitchen—and your lifestyle—for months to come. Dive into creativity, embrace the flavors, and make pumpkin pie spice an everyday essence!

Healthy Home & Environment

0 Comments

Write A Comment

*
*
Related Posts All Posts
02.14.2026

Transform Your Home Into a Nervous System-Friendly Sanctuary

Update Reimagining Your Space: A Nervous System-Friendly Home Have you ever walked into your house and felt the tension creep back into your shoulders, even after a long day? Our homes can either be a sanctuary or a source of stress, especially for busy parents juggling the chaos of family life. A nervous system-friendly home is all about creating an environment that supports regulation and peace, helping us unwind rather than adding to our burden. Understanding the Impact of Environment on Well-Being The connection between our living spaces and how we feel is profound. Our nervous systems are constantly on alert, picking up signals from our surroundings—light, sound, even temperature. Research shows that the right environment can promote calmness and clarity, facilitating better physical and mental health. In fact, a 2009 study highlighted a direct correlation between clutter and elevated stress levels among women, underscoring the necessity of a well-organized space for our well-being. The Power of Light in Your Home When it comes to crafting a calm atmosphere, light is a major player. Natural sunlight, especially in the morning, kicks your body into a healthy rhythm. Consider opening your blinds as soon as you wake up to flood your space with light, acting as a cue for your nervous system that it's time to wake up. Utilizing full-spectrum bulbs during the day and warmer, low-light options in the evening can help your body transition smoothly from day to night. Creating a “light schedule” may seem simple, but its benefits are compounded over time, fostering a more relaxed home environment. Sound Matters: Silence the Stress We often forget the ambient noises lurking in our homes that can contribute to feelings of anxiety. Household sounds—whether it’s a TV left on in the background, the buzzing of appliances, or even the echo of our conversations—create subtle stressors that our bodies pick up. Implementing strategies like reducing noise pollution, using white noise machines, or even incorporating calming sounds from nature can transform your home into a haven of tranquility. Temperature: A Balancing Act for Comfort Did you know that the temperature of your home can significantly affect your mood? Consistently high temperatures can induce irritability, while cooler environments promote better sleep and relaxation. Aim for a comfortable indoor temperature during the day and keep your bedroom cooler at night, ideally in the 60s. Consider using layers—like cozy blankets instead of cranking the heat—to create a sleep-friendly environment. Declutter to Destress Visual clutter can drain our energy and keep our nervous systems on high alert. Simple steps like decluttering hotspots—your entryway, the kitchen counters, and that one chair that seems to collect everything—can make a world of difference. The fewer decisions your brain has to make about your surroundings, the more mental capacity you have for what truly matters. Bringing the Outside In Nature provides invaluable cues of safety and calmness. By incorporating natural materials like wood, plants, and stone into your living space, you not only beautify your home but also enhance its calming atmosphere. Whether adding houseplants or using natural fiber rugs, these elements can be critical in creating a peaceful, grounding environment. Create Cozy Corners A cozy corner can serve as a personal retreat in your home. Set up spaces equipped with your favorite books, comfortable seating, and soft lighting—a designated place for unwinding or enjoying quiet time. Evening rituals, such as sipping herbal tea or listening to soft music, can turn these areas into sanctuaries of relaxation. The Role of Your Bedroom Prioritizing your bedroom as a calming spot can significantly impact your overall wellness. Keep it dark, quiet, and clutter-free to promote restorative sleep. Consider investing in blackout curtains, using low, warm light in the evenings, and creating a meditation or wind-down space. The aim is to form a backdrop for recovery and rejuvenation. Final Thoughts: Small Changes, Big Impact The journey to a nervous system-friendly home doesn’t have to be overwhelming or expensive. Many impactful changes are free and simple—opening windows for fresh air, filling your space with natural light, and minimizing noise can work wonders. Embrace the calmness of your surroundings, and watch as the little adjustments add up to create a supportive home environment that nurtures health, connectivity, and peace.

01.29.2026

Discover How to Grow Microgreens at Home for Maximum Nutritional Benefits

Update Unveiling the Tiny Powerhouses: What Are Microgreens? Microgreens have taken the culinary world by storm, popping up in trendy dishes at gourmet restaurants as well as local markets. But what exactly are these vibrant little plants? Essentially, microgreens are the young seedlings of edible vegetables and herbs, harvested just after the first true leaves emerge. Unlike sprouts, which are consumed whole and carry some food safety risks, microgreens grow in soil and provide more substantial flavor and nutrients. These miniature green powerhouses can include anything from arugula and broccoli to radishes and sunflowers. Health Benefits: Why You Should Embrace Microgreens The appeal of microgreens extends far beyond their looks. Research indicates that these tiny plants can contain up to 40 times more nutrients than their mature counterparts. Consider this: red cabbage microgreens have triple the folate found in mature cabbage, and radish microgreens are notably richer in both calcium and omega-3 fatty acids. Because they are harvested young, microgreens also retain their vitamins and minerals more effectively. Eating vibrant greens like these can boost your intake of essential vitamins A, C, and K, iron, and even antioxidants that combat free radical damage. Growing Microgreens: A Simple Guide for Everyone One of the most exciting aspects of microgreens is their accessibility. You don’t need a backyard or advanced gardening skills to grow them—just a sunny windowsill will do! Here’s a quick rundown on how to get started: Choose Your Seeds: Popular choices include arugula, broccoli, radish, and sunflower. Prepare Your Trays: Use shallow trays with drainage holes filled with organic potting soil or coconut coir. Sow and Water: Sprinkle seeds evenly and mist with water, covering the trays to maintain moisture. Sun and Care: Once sprouted, place the trays in a sunny spot and water lightly from below. Harvest: After about 7 to 14 days, snip the microgreens just above the soil line and enjoy! A Fun Winter Activity: Gardening Indoors Especially during winter months when fresh produce may seem scarce, growing microgreens doubles as a delightful indoor gardening project. Not only does it offer the satisfaction of nurturing a plant, but the act of gardening has been shown to reduce stress levels and enhance overall well-being. Plus, watching your greens grow can serve as an emotional pick-me-up! Let the Flavor Shine: Ways to Utilize Microgreens Incorporating microgreens into your meals can elevate your dishes both in taste and nutritional quality. Toss them into salads, blend them into smoothies, or use them as a vibrant garnish for soups, pizza, and pasta. Their diverse flavor profiles—from spicy to sweet—can enhance the culinary experience. Conclusion: Get Started Today! With their vibrant colors and incredible health benefits, microgreens are the perfect addition to any home kitchen. Plus, they are a fun and simple way to embrace gardening, no matter your skill level. So why not give it a try and start growing your own? The rewards for your health and well-being can be extraordinary. To learn more about integrating microgreens into your diet, check out local gardening workshops or online resources that provide tips on growing techniques and nutritional profiles of various microgreens.

01.16.2026

Create Your Own Homemade Baby Balm for Safe, Natural Skincare

Update The Case for Homemade Baby Balm: Understanding IngredientsAs parents, the well-being of our little ones occupies the forefront of our minds. For many, this means ensuring that every product we apply to their skin is both safe and effective. The beauty of crafting homemade baby balm is twofold: it lets us control what goes into the formulation while ensuring we avoid the harmful ingredients often found in commercial baby lotions and creams.Why Go Natural? The Hidden Dangers in Commercial ProductsReflecting on personal experiences, many new parents are gifted numerous bottles of commercial baby lotion, often assuming these products are the best for their baby’s delicate skin. However, ingredients like petroleum, artificial fragrances, and other synthetic compounds can be lurking behind innocent labels, potentially leading to skin irritation or other health issues. According to experts, it's crucial for parents to navigate beyond catchy advertising and focus on the ingredient list instead.Crafting Your DIY Baby BalmCreating your own baby balm allows you to select high-quality, natural ingredients that nourish and protect your baby's skin. The core components of an effective homemade balm include:Cocoa Butter: Rich in antioxidants and fatty acids, cocoa butter forms a protective barrier that locks in moisture.Shea Butter: This natural butter is lauded for its skin-nourishing properties and vitamin-rich composition.Olive Oil: Known for its ability to repair and attract moisture, olive oil is an essential base for any baby balm.Castor Oil: With its unique properties, castor oil protects the skin while also offering a moisturizing effect.Gentle Essential Oils: If you're inclined towards aromatherapy, consider family-safe essential oils like frankincense, lavender, and chamomile. However, it's critical to keep necessary dilution levels in mind—only a small amount should be used when creating balms for babies.Herbal Infusions: A Gentle AlternativeIf you're seeking a balm devoid of essential oils—especially for babies under three months—herb-infused oils provide a soothing alternative without the complexities of potent essential oils. Herbs like lavender, calendula, and chamomile possess natural healing properties that can help maintain and restore your baby’s skin.Step-by-Step Guide to Making Your BalmNow that you understand the importance of natural ingredients, let's explore the actual process of creating your homemade baby balm:Ingredients:¼ cup cocoa butter¼ cup shea butter2 tablespoons olive oil1 tablespoon castor oil7 drops of your preferred essential oil (optional)Instructions:Using a double boiler or a glass bowl placed over boiling water, melt the cocoa butter and shea butter together.Add the olive oil and castor oil until blended.Remove from heat, allow to cool slightly, then stir in the essential oils.Pour into a glass jar and let it cool in the fridge until set, typically requiring a couple of hours.Store at room temperature and use a small amount as needed.The Benefits of Creating Your Own Baby BalmTaking the time to make baby balm at home not only saves money in the long run but also instills a sense of accomplishment and care in parents. Each small batch can be customized to fit your baby's specific skin needs, treating conditions like diaper rash or dryness naturally. The freedom of knowing every ingredient allows parents to build trust with the products they choose for their children.Conclusion: Empowering Parents through DIY SolutionsBy opting for homemade baby balm, you’re equipping yourself with knowledge and skills that lead to healthier and happier skin for your child. Embracing this creative process transforms an otherwise mundane task into a nurturing experience, allowing you to take control over what goes on your baby’s skin. So why not gather your ingredients and start this delightful journey towards natural skincare?

Terms of Service

Privacy Policy

Core Modal Title

Sorry, no results found

You Might Find These Articles Interesting

T
Please Check Your Email
We Will Be Following Up Shortly
*
*
*